Unlock Culinary Excellence: The Transformative Power of DIY Homemade Coconut Milk
In a world brimming with convenience, it's easy to assume that every ingredient worth using can be plucked from a grocery shelf. Yet, some culinary pursuits demand a little extra effort, promising a payoff that far outweighs the work involved. Making your own coconut milk falls squarely into this category. If you, like many home cooks, have experienced the unpredictable nature of canned coconut milk – from watery disappointments to curdled catastrophes – then it's time to discover the game-changing potential of
diy homemade coconut milk. This isn't just about saving a few dollars; it's about unlocking unparalleled flavor, consistency, and control in your cooking.
Why bother, you ask? Because the difference is palpable. A truly creamy, flavorful Thai curry, a perfectly balanced Colombian coconut-braised dish, or an exquisitely smooth tropical smoothie hinges on the quality of its coconut milk. Store-bought versions, despite their convenience, often fall short, introducing an element of culinary roulette that can derail even the most meticulously planned recipes. Embrace the art of making your own, and you'll find yourself wondering why you didn't start sooner. For a foundational understanding of this culinary essential, and if you're ready to dive deeper into the world of fresh, homemade ingredients, continue exploring our insights on
diy homemade coconut milk - Article 1.
The Inconsistency Conundrum: Why Store-Bought Coconut Milk Often Falls Short
The primary challenge with commercially produced canned coconut milk lies in its inherent inconsistency. Unlike dairy milk, which clearly labels its fat content, coconut milk can be a wild card, boasting anywhere from a meager 5% to a robust 20% fat. This vast range creates a significant hurdle for home cooks and professional chefs alike. Imagine developing a recipe that calls for a specific richness, only to have it completely altered by a different brand or even a different batch of the same brand of coconut milk.
This variability manifests in several frustrating ways:
- Watery Dishes: A low-fat can might leave your curries thin and lacking in body, demanding more cream or prolonged reduction to achieve the desired consistency.
- Curdled Messes: Conversely, high-fat, less stabilized versions can sometimes curdle when exposed to heat or acidic ingredients, creating an unappealing texture.
- Flavor Dilution: The nuanced, fresh taste of coconut can often be muted or even tainted by metallic notes from the can or the presence of additives and preservatives, which are common in many store-bought options.
Our own culinary experiments have repeatedly shown that these inconsistencies can make or break a dish. When developing a Thai-style coconut and chicken soup, for instance, our kitchen encountered a frustrating series of mixed results with various canned brands. It became clear that to achieve a *consistently* delicious outcome, they needed to take control of the coconut milk itself. The solution? Making their own
diy homemade coconut milk. This simple shift not only resolved the consistency issues but also elevated the entire dish to a new level of freshness and flavor.
The Unrivaled Taste and Texture of DIY Homemade Coconut Milk
If you've only ever tasted coconut milk from a can, prepare for a revelation. The moment you take that first sip of freshly made coconut milk, you'll understand why it's worth every minute of preparation. The flavor profile is simply incomparable:
- Rich, Yet Balanced: It delivers a luxurious richness that coats the palate without leaving a heavy, fatty film. This perfect balance ensures a satisfying mouthfeel in any dish.
- Lightly Sweet and Fresh: Unlike some commercial versions that can taste overly processed or cloyingly sweet, homemade coconut milk offers a delicate, natural sweetness. It carries a vibrant freshness that brightens any recipe.
- Warm, Lingering Nuttiness: There's a subtle, warm nuttiness that permeates the milk, lingering pleasantly on the tongue. This complex flavor adds depth and authenticity that is impossible to replicate with store-bought alternatives.
This superior taste isn't just a matter of personal preference; it translates directly to the quality of your cooking. Imagine a creamy soup that boasts an authentic coconut essence, or a curry where the milk binds all the spices and ingredients into a harmonious, silky emulsion. Homemade coconut milk provides that crucial foundational element, allowing other flavors to shine without being overshadowed or compromised by artificiality. It’s the difference between a good dish and a truly unforgettable one, and it's a difference that is instantly noticeable to anyone with a discerning palate.
Your Simple Guide to Making Homemade Coconut Milk
Making your own
diy homemade coconut milk is surprisingly straightforward and requires minimal equipment. The process essentially rehydrates dried coconut, blends it with water, and then strains out the solids – much like how commercial versions are made, but with your control over the ingredients and freshness.
Ingredients and Equipment:
- 2 ½ cups good quality unsweetened dried shredded coconut (or fresh grated coconut if available)
- 3 cups filtered water (preferably warm, but not boiling)
- A high-speed blender
- A fine-mesh sieve or nut milk bag
- A bowl for collecting the milk
Step-by-Step Instructions:
- Soak the Coconut: Place the dried shredded coconut in a bowl. Pour the 3 cups of warm filtered water over the coconut. Let it soak for at least 5 minutes, or up to 30 minutes, until the coconut softens and absorbs some of the water. If using fresh grated coconut, you can skip the soaking step, or soak briefly if you prefer.
- Blend for Creaminess: Transfer the soaked coconut and water mixture to a high-speed blender. Blend on the highest setting for 1 to 2 minutes. You want the mixture to be as smooth as possible, ensuring maximum flavor and fat extraction. The liquid should turn opaque and milky.
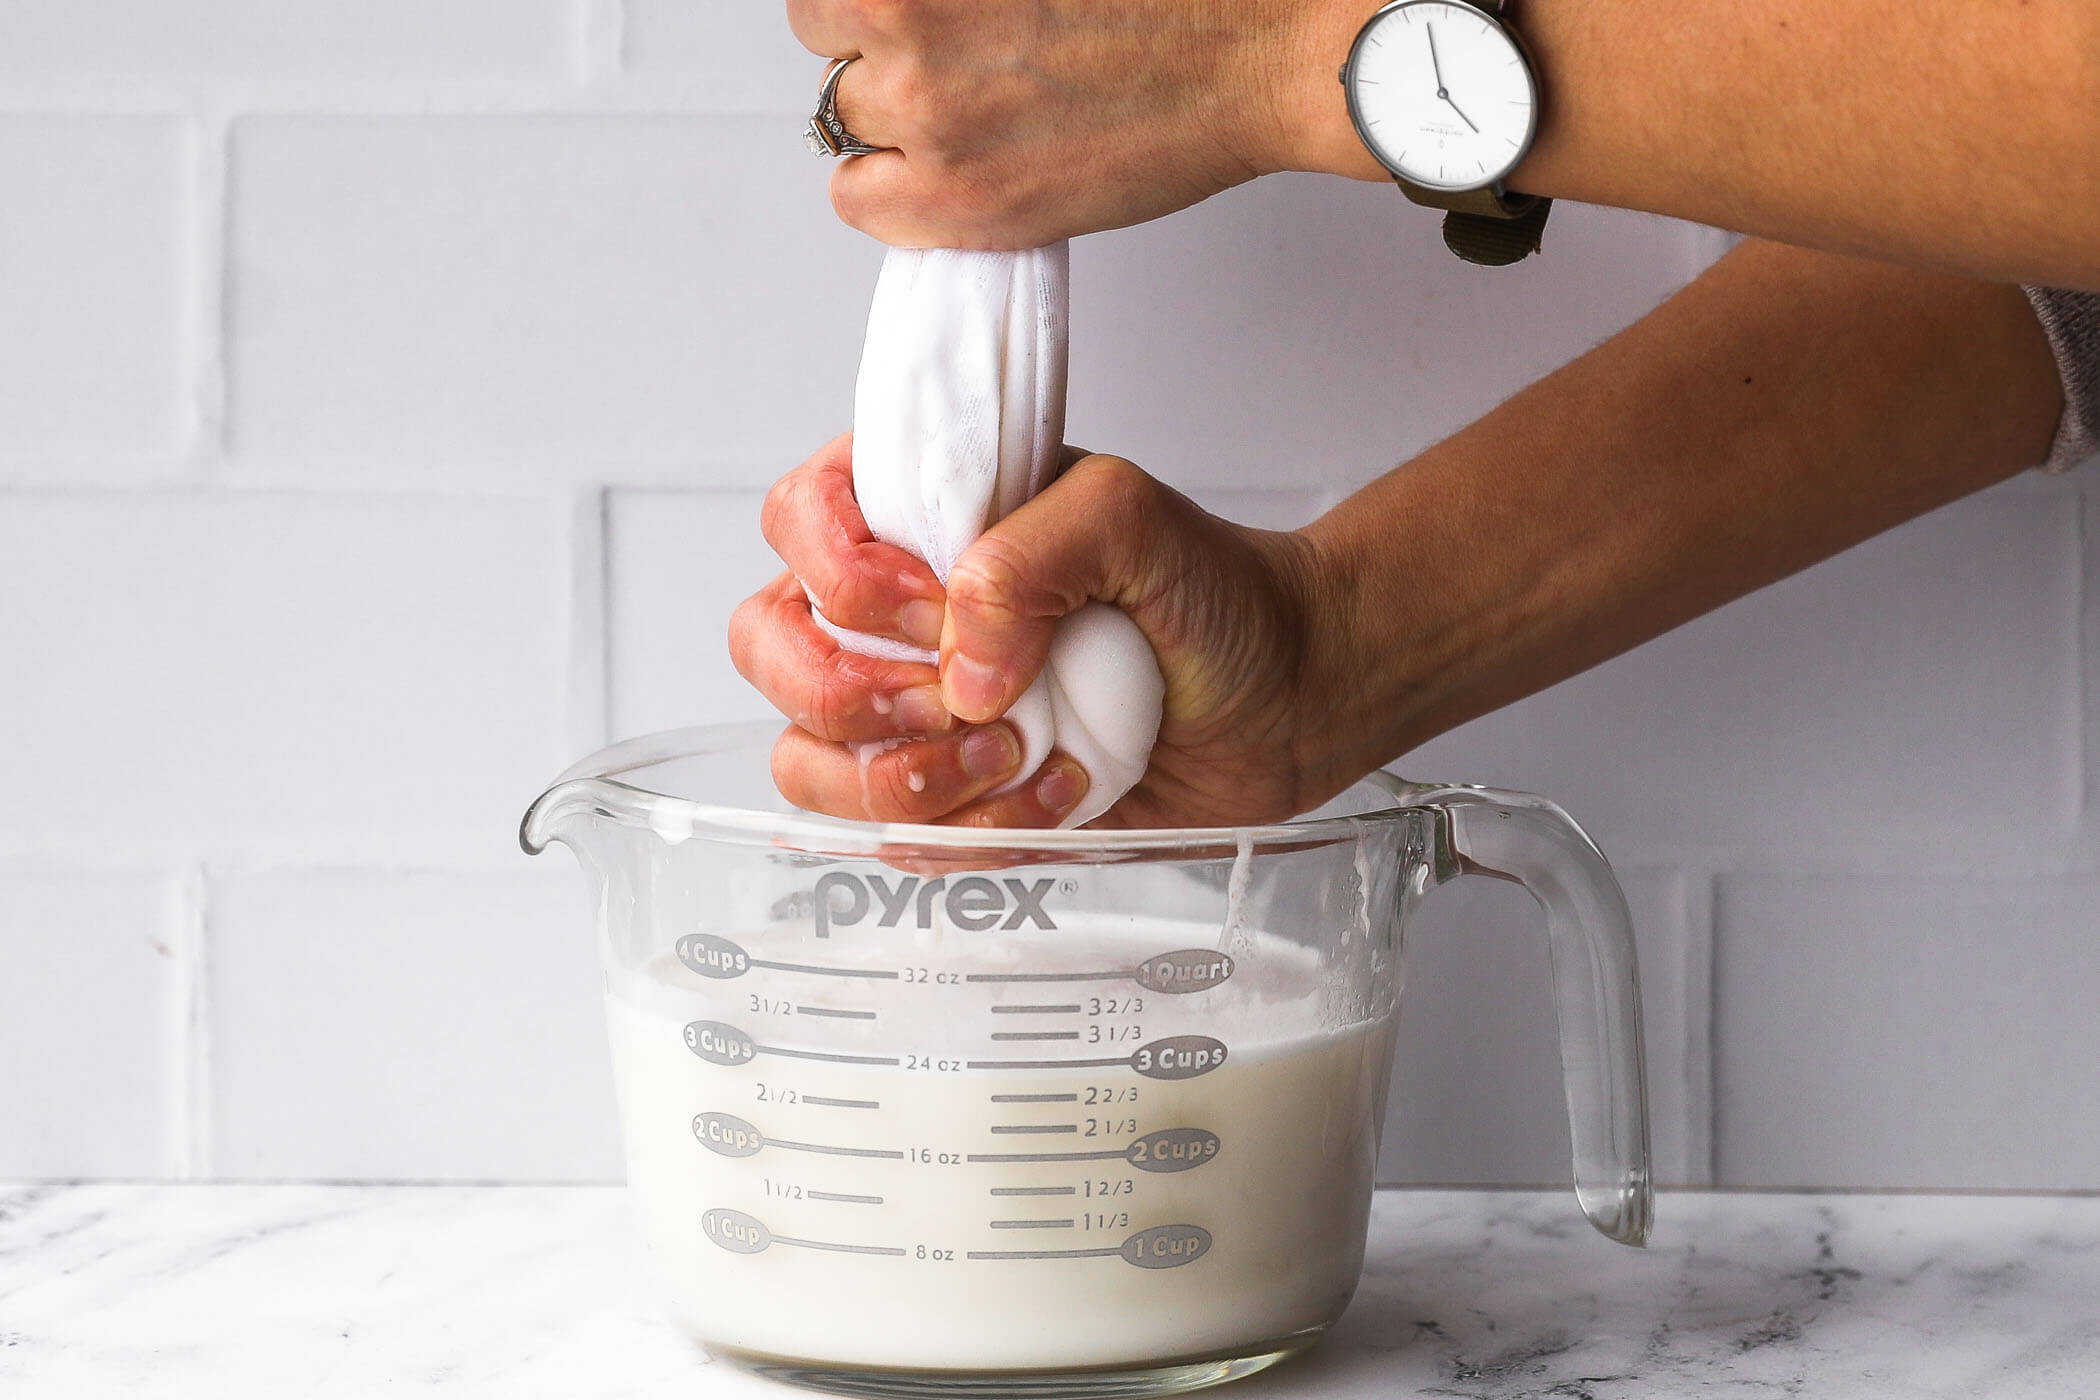
- Strain the Milk: Place your fine-mesh sieve over a large bowl. If you want an even silkier consistency, line the sieve with a cheesecloth or use a nut milk bag. Pour the blended coconut mixture into the sieve.
- Extract Every Drop: Using the back of a spoon or a spatula, press down firmly on the coconut pulp in the sieve to extract as much liquid as possible. If using a nut milk bag, gather the top of the bag and squeeze with clean hands until no more liquid comes out. The remaining pulp can be saved for other uses (see tips below!).
- Store and Enjoy: Transfer your fresh homemade coconut milk to an airtight container. It's ready to use immediately!
Tips for Success and Storage:
- Choosing Coconut: While dried shredded coconut is widely available and works wonderfully, using fresh grated coconut (especially if you have access to whole coconuts) will yield an even more intensely fresh flavor.
- Maximizing Yield: Don't be shy about pressing the pulp. The harder you press, the more rich, creamy milk you'll extract.
- Storage: Homemade coconut milk is best consumed fresh. Store it in an airtight container in the refrigerator for up to 3-4 days. It may separate into a cream layer and a water layer – this is natural! Simply stir or shake it vigorously before use.
- Freezing: For longer storage, pour the coconut milk into ice cube trays and freeze. Once solid, transfer the cubes to a freezer-safe bag. Thaw as needed for your recipes.
Beyond the Basics: Customizing and Utilizing Your Homemade Coconut Milk
Once you've mastered the basic technique for
diy homemade coconut milk, you can begin to experiment and tailor it to your specific needs. This level of control is one of the greatest advantages over store-bought alternatives.
Adjusting Fat Content and Consistency:
- Thicker Milk: To achieve a richer, thicker coconut milk (closer to coconut cream), simply reduce the amount of water you use in the blending process. Start with 2 cups of water for 2 ½ cups of coconut for an extra creamy result.
- Lighter Milk: For a thinner consistency, akin to "light" coconut milk, you can increase the water to 4 cups or even dilute the finished milk with a splash of water or coconut water.
- Second Extraction: Don't throw out that pulp after the first squeeze! You can often get a second, thinner batch of coconut milk from it. Simply return the pulp to the blender with another 1-2 cups of fresh water, blend again, and strain. This "second pressing" is excellent for baking or dishes where a less intense coconut flavor is desired.
Creative Uses for Leftover Coconut Pulp:
The leftover pulp is a fantastic byproduct and shouldn't go to waste!
- Coconut Flour: Spread the pulp thinly on a baking sheet and dehydrate it in a low oven (around 200°F/95°C) until completely dry. Once dry, you can blend it into a fine flour, perfect for gluten-free baking.
- Smoothie Booster: Add a tablespoon or two of the wet pulp directly to your smoothies for extra fiber and coconut flavor.
- Granola or Energy Bites: Incorporate the pulp into homemade granola recipes or energy bite mixtures.
- Body Scrub: For a non-culinary use, mix the pulp with a little coconut oil and sugar for a luxurious homemade body scrub!
Culinary Applications Beyond Soup:
While homemade coconut milk is indeed the key to consistently creamy soups, its versatility extends far beyond:
- Curries and Stews: Elevate any curry, from rich Indian Kormas to spicy Thai Gaeng Phets, with the pure flavor and silky texture of fresh coconut milk.
- Smoothies and Drinks: Blend it into tropical smoothies, use it as a dairy-free milk alternative for your coffee or tea, or create refreshing mocktails.
- Desserts: From panna cotta and rice puddings to ice creams and custards, homemade coconut milk adds an unparalleled richness and aroma to sweet treats.
- Baking: Substitute it for dairy milk in cakes, muffins, and breads for a unique flavor profile and moist texture.
- Marinades and Sauces: Use it as a base for marinades for chicken or fish, or whisk it into savory sauces for an extra layer of flavor.
For more advanced techniques or troubleshooting, our comprehensive guide on
diy homemade coconut milk - Article 3 offers additional valuable insights.
Conclusion: The Freshness Revolution Your Kitchen Deserves
Stepping into the world of
diy homemade coconut milk is more than just adopting a new recipe; it's an investment in the quality, consistency, and flavor of your home cooking. Bid farewell to the frustrating inconsistencies of store-bought cans and embrace the pure, rich, and fresh taste that only homemade can deliver. It’s a simple process with profound culinary rewards, offering you complete control over ingredients, fat content, and overall quality. Once you experience the difference this fresh ingredient makes in your favorite dishes, from creamy soups to vibrant curries and decadent desserts, you'll understand why this "extra work" is unequivocally worth it. Give it a try – your taste buds, and your recipes, will thank you.